How to deploy UI installer for developers
To deploy a new version of the application installer, please follow the steps outlined below.
Note, you must be a collaborator on the project to run this workflow from the main repository. Please contact one of the team members to be added as a collaborator OR create your own fork.
- Navigate to the GitHub deployment dispatch here OR create a fork of idaes-eletron-build, navigate to actions, and click Application Build Dispatch on the left sidebar.
- Click on Run workflow dropdown.
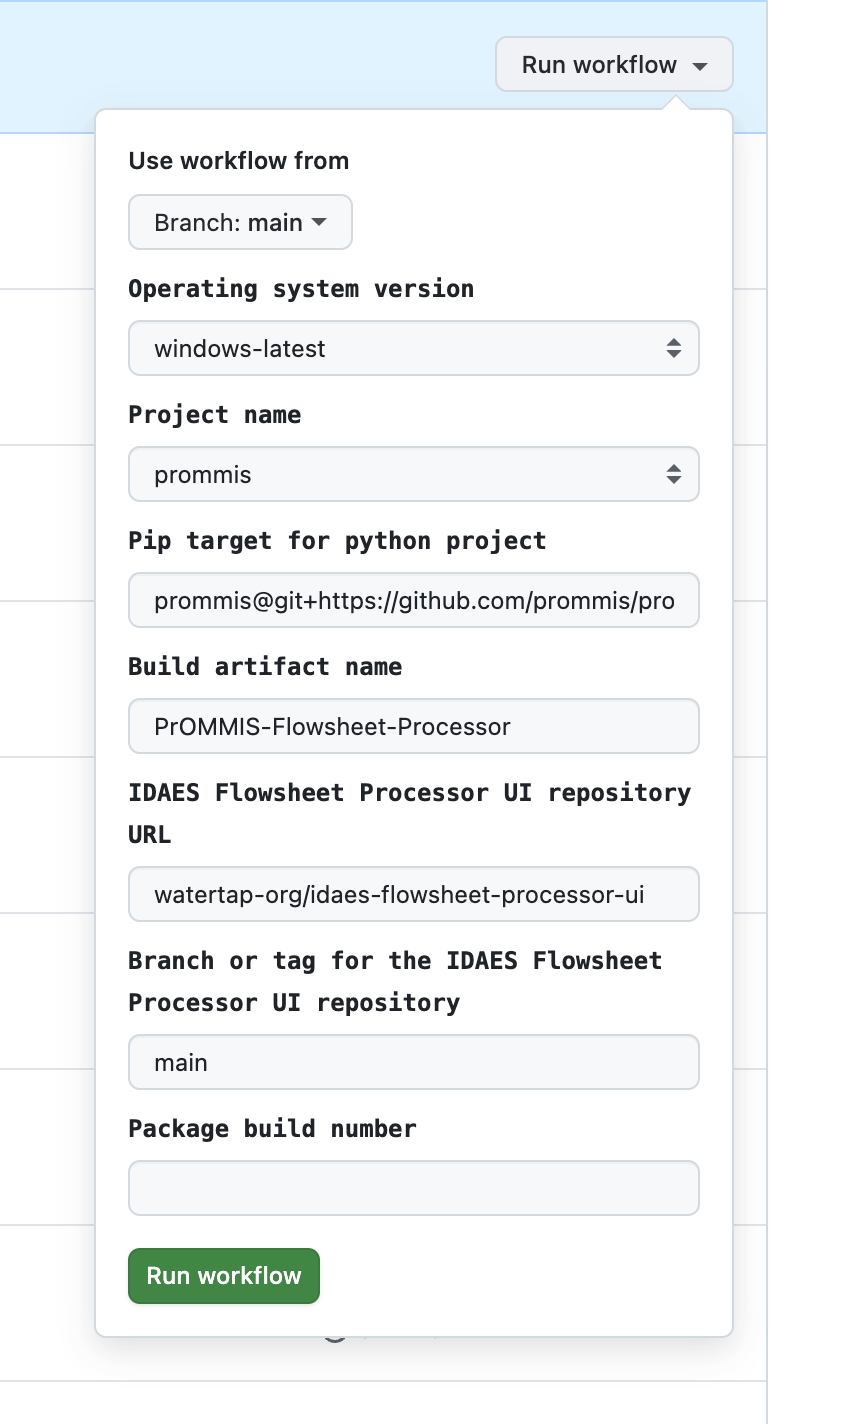
- Fill out inputs. Some have default values, but be sure to choose the correct operating system, project, pip target, and artifact name. See image below.
- Click run workflow.
Code-sign your application
The build workflow outlined above has code-signing built into it. However, to run the code-signing steps, you must complete a few additional steps.
Windows
- Purchase a Microsoft code-signing certificate, and host it in Azure Key Vault. For a step-by-step guide on how to accomplish this, follow this tutorial.
- Once you complete this, you should have the following credentials: AZURE_KEY_VAULT_URI, AZURE_CLIENT_ID, AZURE_TENANT_ID, AZURE_CLIENT_SECRET, AZURE_CERT_NAME.
- In your fork of idaes-electron-build, navigate to Settings -> Secrets and Variables -> Actions.
- Add a new repository secret for each of AZURE_KEY_VAULT_URI, AZURE_CLIENT_ID, AZURE_TENANT_ID, AZURE_CLIENT_SECRET, AZURE_CERT_NAME, using the values for your client.
Mac
There are 2 steps for creating trusted Mac applications. The application must be code signed, and then it must be uploaded and notarized by Apple. Both of these steps are covered in the workflow, as long as proper credentials are provided.
- Sign up for an Apple Developer Account
- Create a Developer ID Application certificate.
- Add a new repository secret for each of APPLE_BUILD_CERTIFICATE_BASE64, P12_PASSWORD, and KEYCHAIN_PASSWORD for code-signing, in addition to APPLE_ID, APPLE_ID_PASSWORD, and TEAM_ID for notarizing.
Once you have added the proper credentials as secret variables, the workflow will automatically detect them and attempt to use them for code-signing the application during the build process.